

AWS | Deep Dive into ECS: Part 1


ECS (Elastic Container Service), an AWS managed service that provides container orchestration and makes it easy for us to deploy, manage, and scale containerized applications.
In this blog, let’s discuss the ECS service of AWS in detail and run a sample java application on it. [ECS integration with Code Pipeline will also be covered in upcoming blogs.]
Prerequisite:
Basic knowledge about Containers and AWS services like VPC, IAM, S3 etc.
Docker needs to be installed.
What is ECS ?
It is similar to docker containers but managed by AWS. It has four major components:
Cluster
Task Definition
Task
Service
Cluster: It is a logical group of tasks or services. If you are using EC2 as a launch type, then EC2 will spin up upon creating a cluster. If using Fargate, the server will also be managed by AWS.
Task Definition: It is a blueprint of your containers. You specify all the details about your containers in the task definition (TD). Ex: image, variables, container port, volumes, logging, etc. You cannot modify the task definition. Each time, you have to create a new TD for any minor or major modifications.
Task: Based on your TD, a new task i.e container will deploy on the cluster. Multiple tasks can be launched with the same TD.
Service: Based on your TD, a service will deploy and maintain the new tasks i.e container on clusters. If any of your tasks fail, then the service will redeploy them automatically. There are two types of deployments: Replica & Daemon.
Let’s run the demo application now. Deploy the application on host first, then on docker container and lastly on ECS to get a better understanding.
Here, I am using the sample application from GitHub. You can use your code to deploy the application.
Running the App in your local
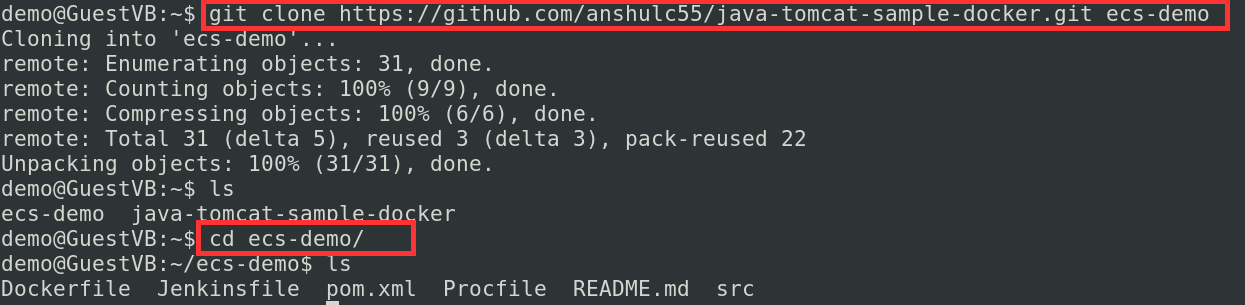
Step:1 Clone the git repository in your local directory and go to it.
git clone github.com/anshulc55/java-tomcat-sample-docker.git ecs-demo
cd ecs-demo/
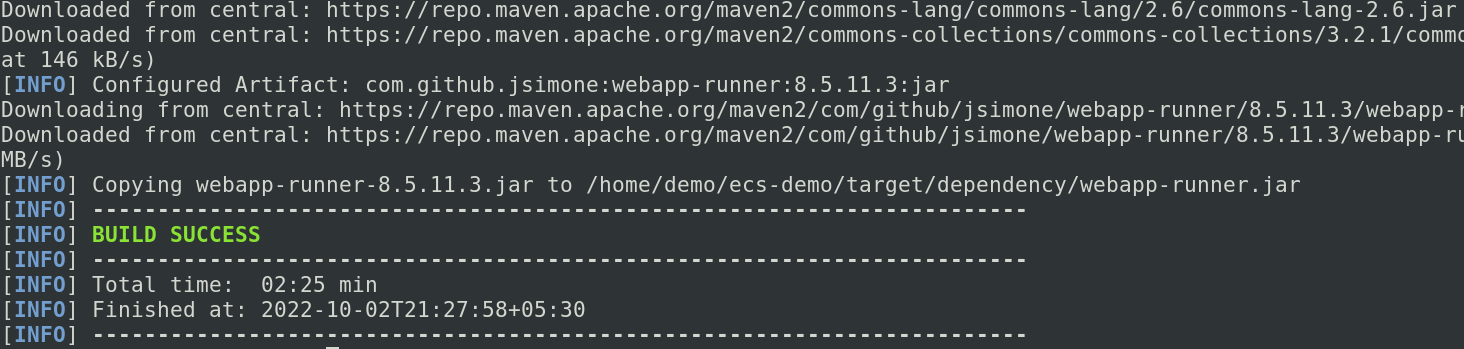
Step:2 Now, build the code with mvn.
mvn package
Step:3 Run the java app
java -jar target/dependency/webapp-runner.jar
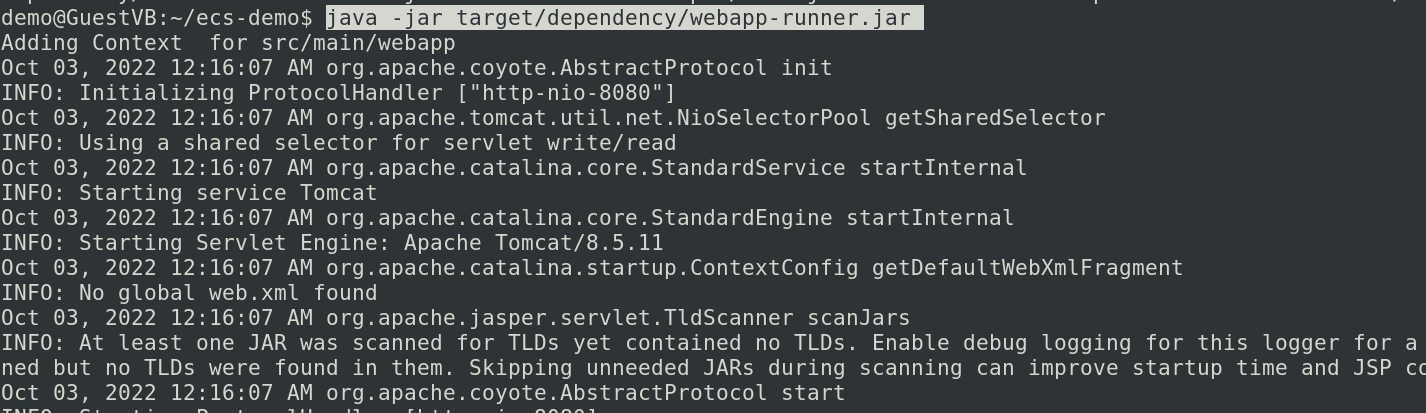
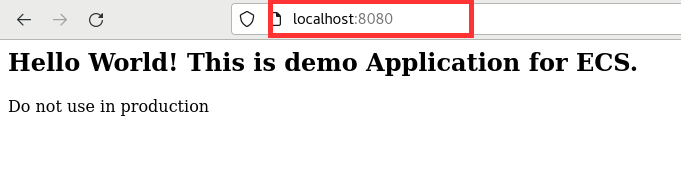
App running on Host machine
I have made some changes in the default page in “src/main/webapp/index.jsp”
Our application is working fine. Now move to the next phase, i.e., run the app on docker containers and push the docker image to ECR (Elastic Container Registry) or Dockerhub.
Running the App on Docker
Step: 1 Remove the old content and paste the below to modify the Dockerfile,
demo@GuestVB:~/ecs-demo$ cat Dockerfile
FROM maven:3.6.1-jdk-8-alpine AS MAVEN_BUILD
WORKDIR /build/
COPY pom.xml /build/
COPY src /build/src/
WORKDIR /build/
RUN mvn  package
EXPOSE 8080
CMD ["java", "-jar", "target/dependency/webapp-runner.jar"]
Here, tomcat server can be used to deploy .war file.
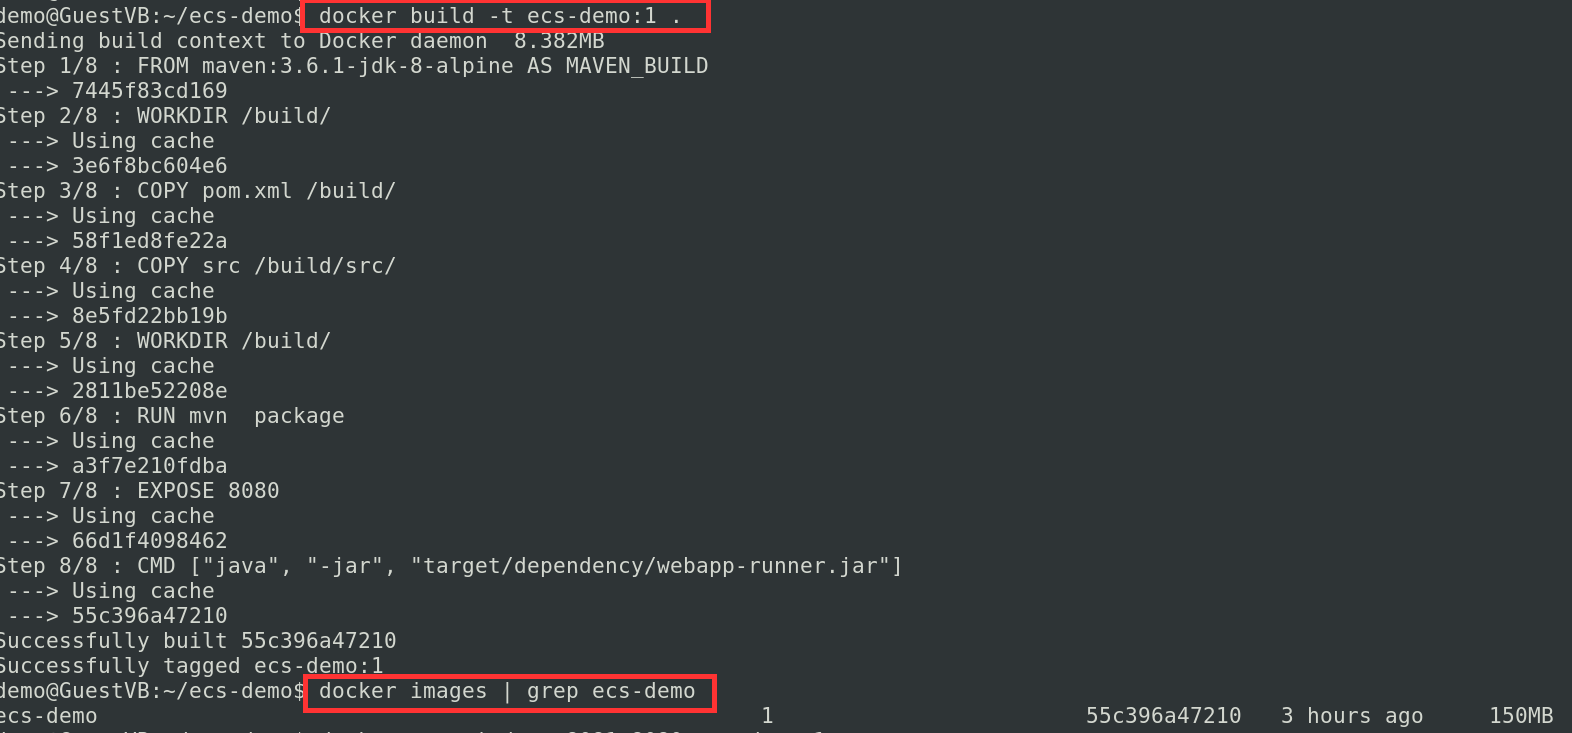
Step:2 Now, build it to create a docker image.
docker build -t ecs-demo:1 .
Validate, if docker image is created using the below command:
docker images | grep ecs-demo
Step:3 Time to launch a docker container,
docker run -itd -p 8081:8080 ecs-demo:1
8081: Host port, through which we will access the app on host machine.
8080: Container port, on which app is running inside container
Validate if a container is running using the below command:
docker ps

Access the app on port:8081 in your browser.
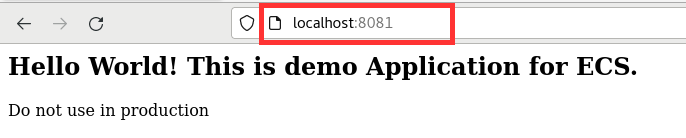
App running on Docker Container
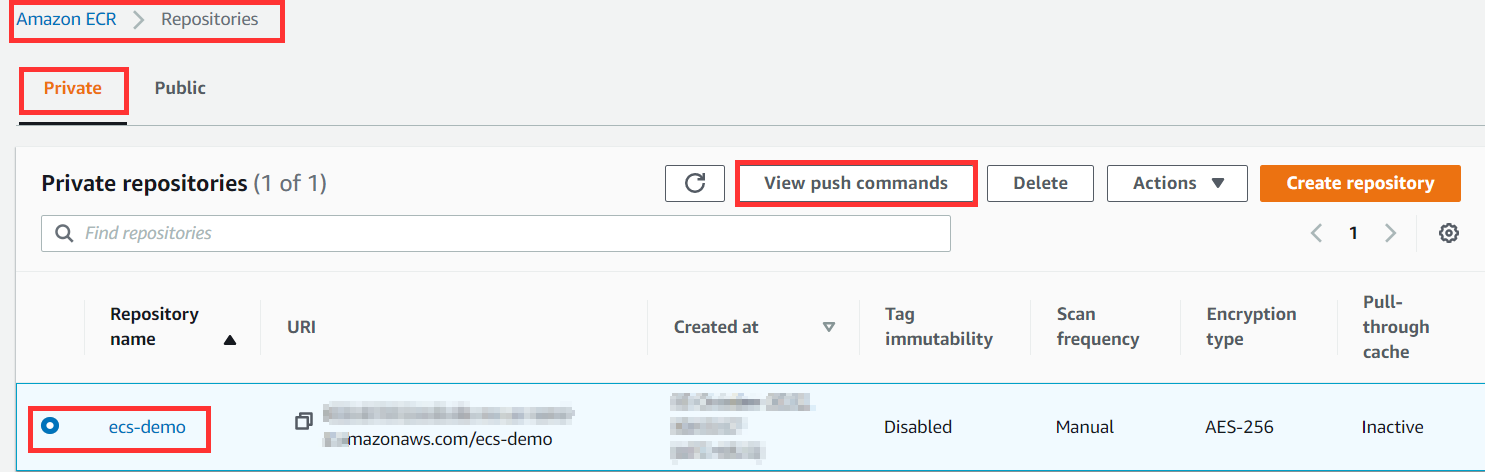
Step:4 Login into AWS account and go to ECR service.
Create a private container repository in aws account in the required region, and click on the View push commands option to get further steps for pushing the docker image from our local to the ECR.
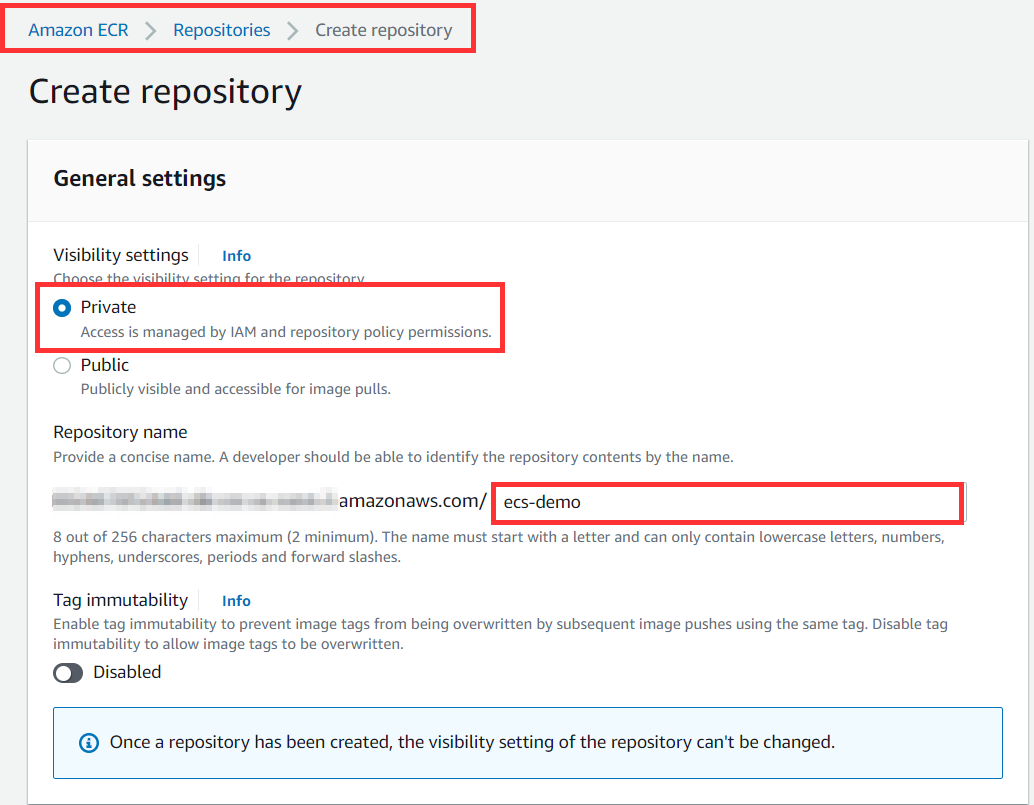
Repository name is ecs-demo
Select the repo and click on the View push commands option.
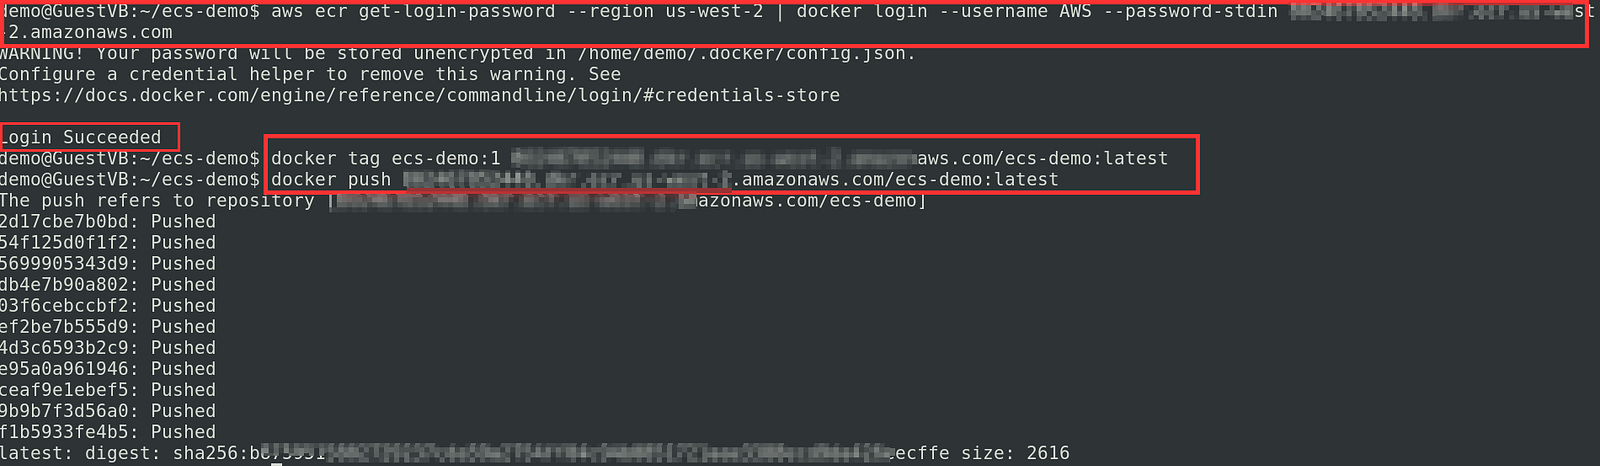
Step:5 Here, you will find commands to login and push images to ECR. Before proceeding, configure the awscli or export the aws credentials on the host machine.
1) aws ecr get-login-password --region <region> | docker login --username AWS --password-stdin 012345678.dkr.ecr.us-west-2.amazonaws.com
2) Skipping, as already build the image
3) docker tag ecs-demo:1 012345678.dkr.ecr.us-west-2.amazonaws.com/ecs-demo:latest
4)docker push 012345678.dkr.ecr.us-west-2.amazonaws.com/ecs-demo:latest
DO NOT copy the above commands. Copy the commands from the View push commands option.[Because your account ID will be different]
In the 3rd option, replace ecs-demo:latest with ecs-demo:1.
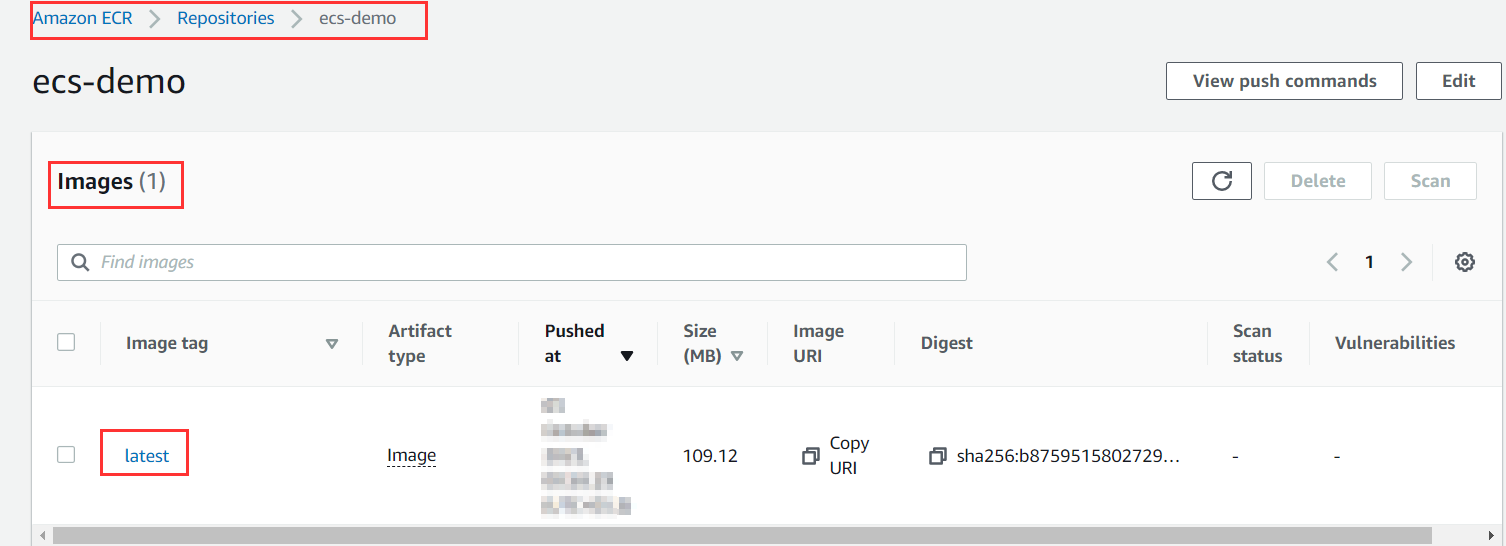
Step 6: Open the AWS console to see the pushed docker image.
Running the App on ECS
Note: All the resources must be in same region.
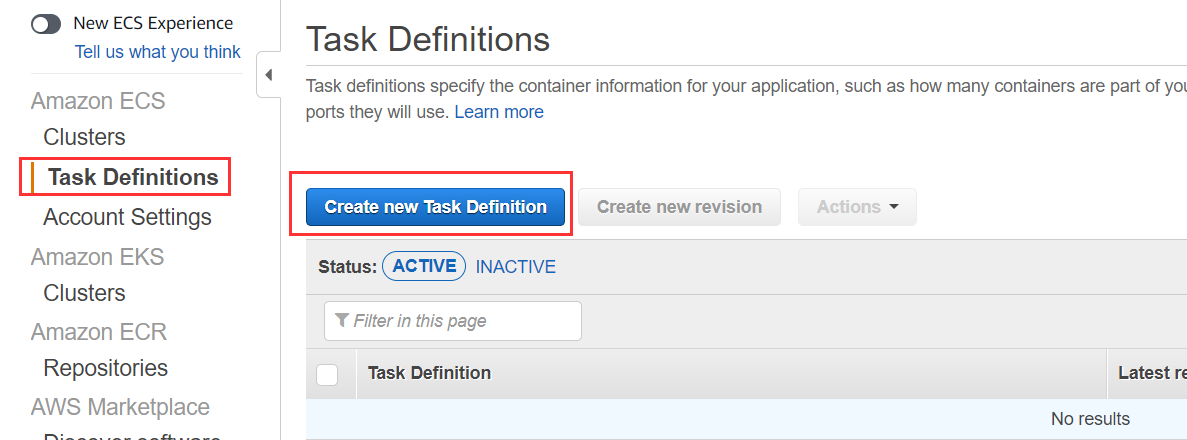
I. Creation of Task Definition:
Step:1 From the AWS console, go to ECS and create a Task Definition.
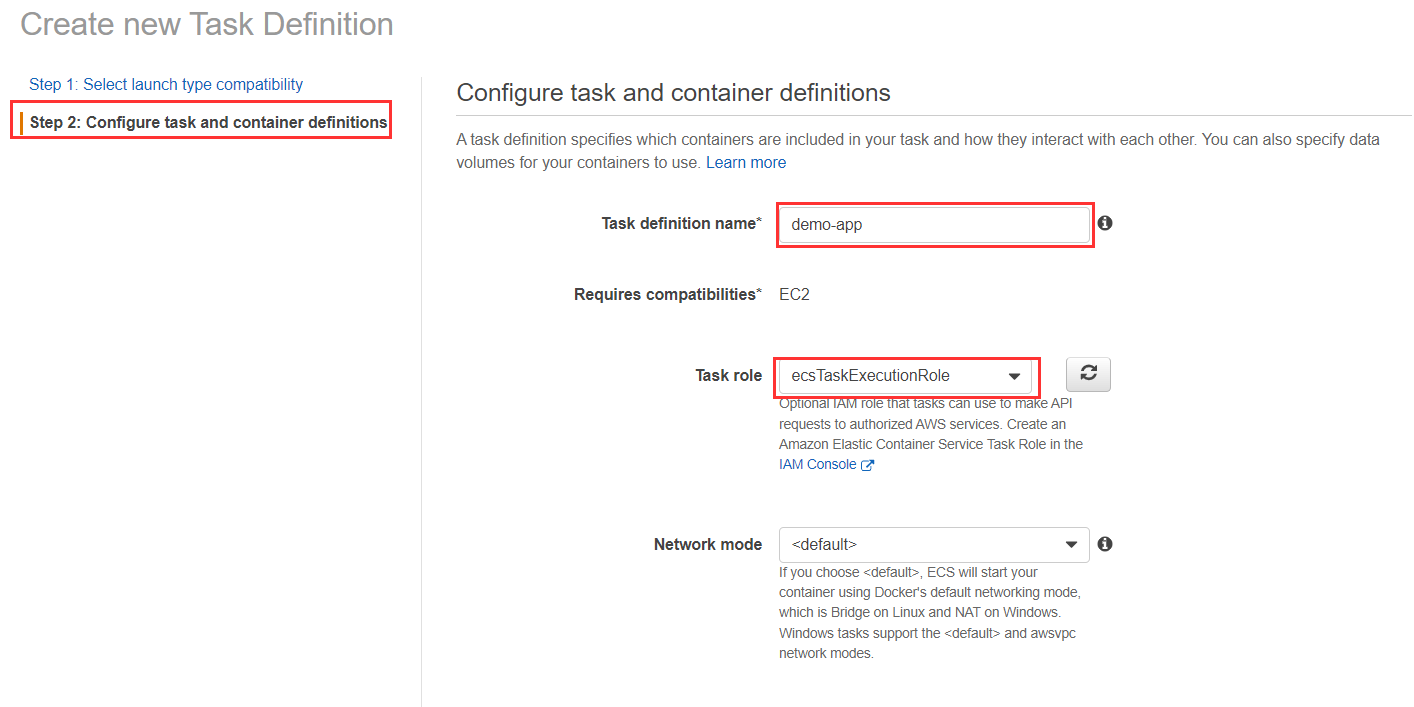
Step:2 Select EC2 as the launch compatibility type and then click Next.
In Fargate, we do not have to manage the servers on which a container is running. It is managed by AWS. In contrast, we must manage the servers in EC2.

Step:3 Let’s give a name to our task definition. Task role is optional, we can select the default one. Keep default to Network mode.
Network mode:
bridge: It is Docker’s virtual built-in network that works inside EC2. [bridge network in Dockers].
host: It directly maps container ports to the elastic network interface (ENI) of EC2.
awsvpc: It has its own ENI and IP address, so its network properties are the same as an EC2
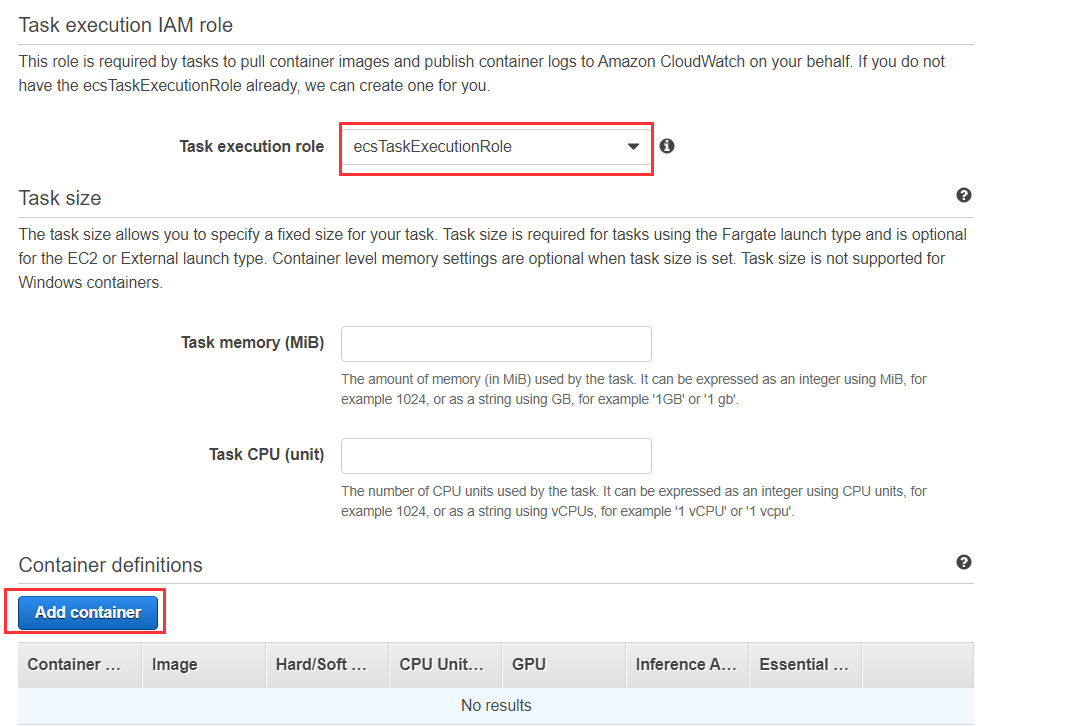
Step:4 Select the IAM role (default IAM role that we selected earlier). Now click on Add Container to add the container specifications. All the container specific properties are configured in this section only.
Step:5 Give any name to the container and the ECR image path with a tag in the image field. It is recommended to keep the tag latest so that it can fetch an updated image every time.
Soft or hard limits are put in place to restrict the resources used by the containers.
The host port is used to access the app from outside the container, while the container port is used to access the app from within the container.
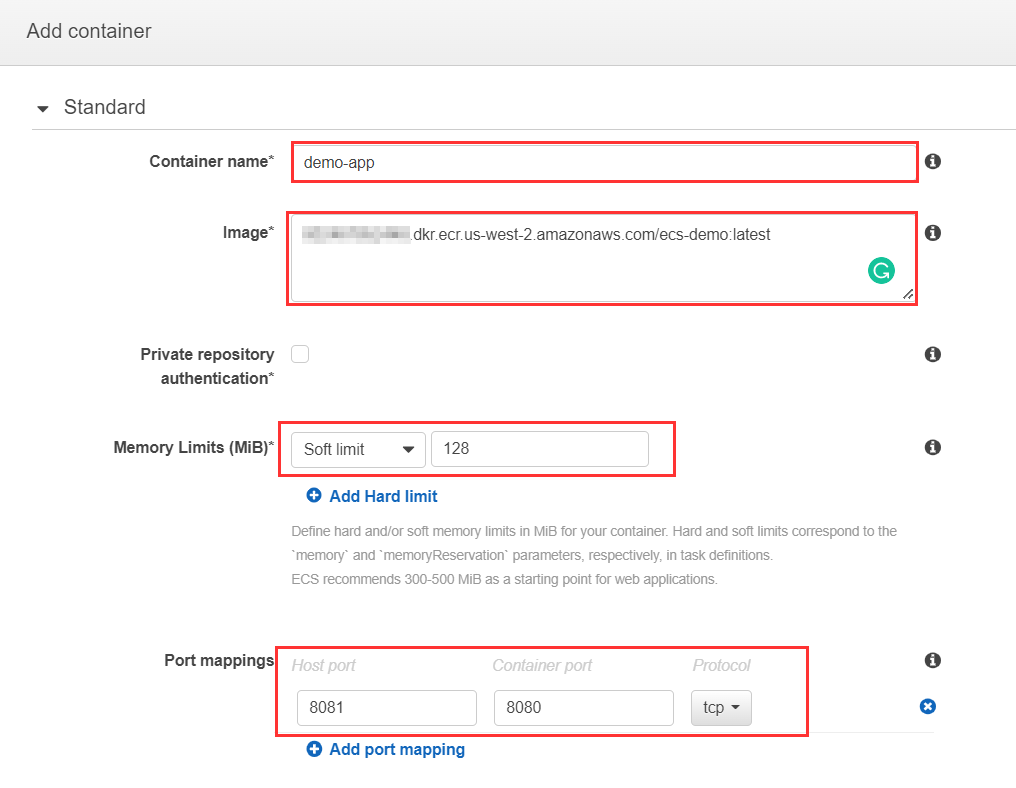
Leave the remaining fields as defaults and begin creating the task definition.
II. Creation of Cluster :
Step:1 Create a security group for the ECS cluster. Let’s add only two ports for now:
port 8081: Application port
port 22: For SSH[Allow access only from my IP]
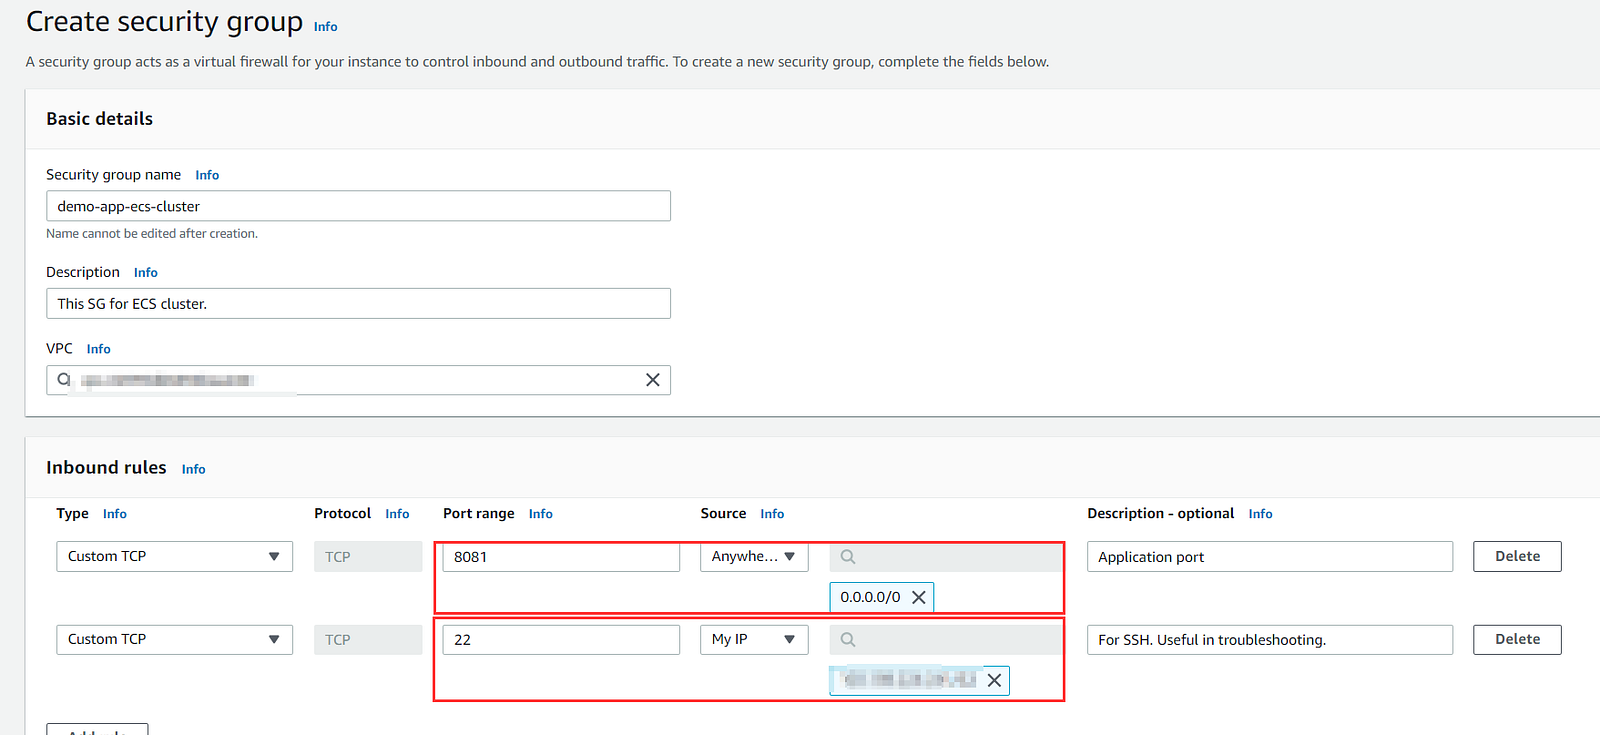
SG for ECS cluster
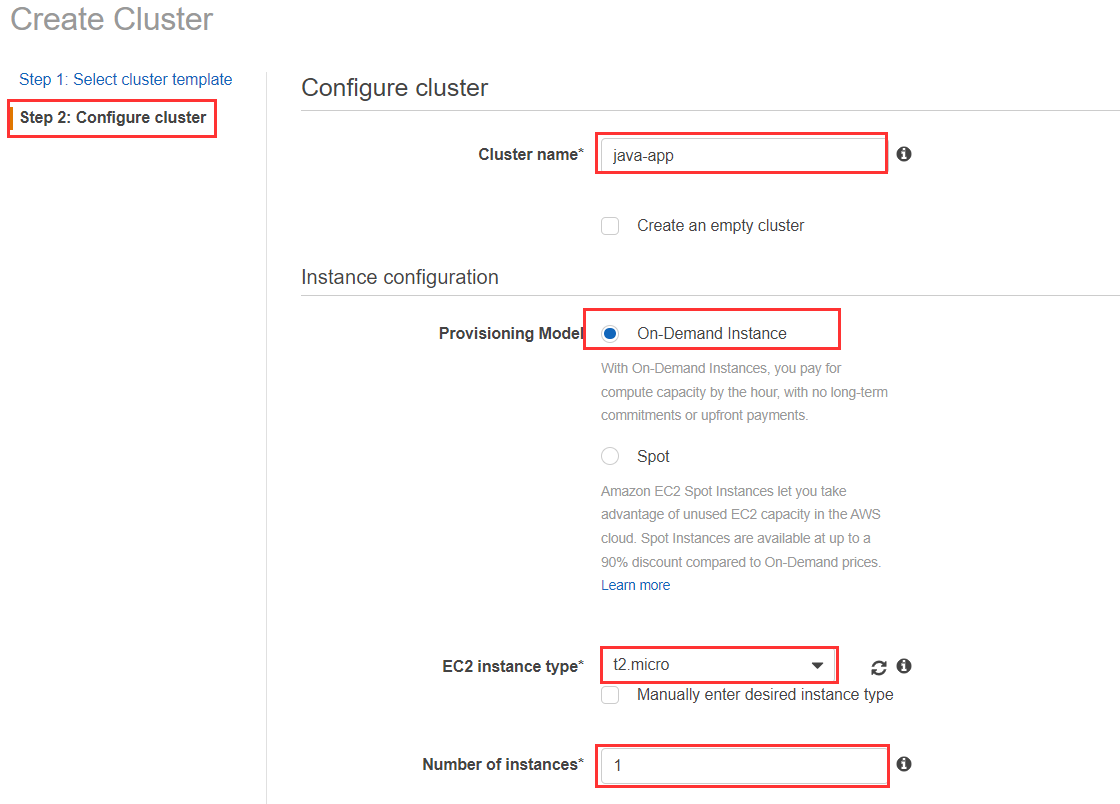
Step:2 From the navigation panel, go to Clusters and then click on Create Cluster. Continue to the Next Step after selecting EC2 Linux + Networking.
Fill in all the details. We can set the instance type and number of instances as per our requirements. These are the specifications of our cluster or EC2.
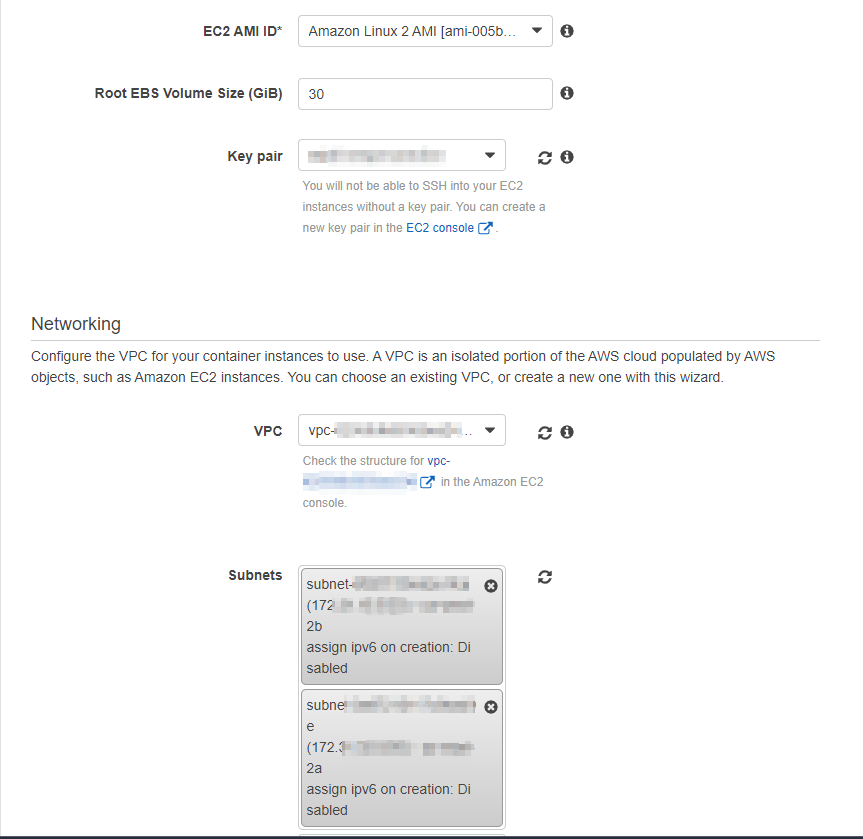
AMI ID: Amazon linux is provided in it.
EBS Volume Size: A minimum of 30 GB is required.
key Pair: It’s to login into your EC2 instances. It is useful for troubleshooting and gaining a better understanding of backend issues.
VPC: In which our EC2 instance will be launched. we are using the default VPC & Subnet.
Subnet: Select at least two availability zones.
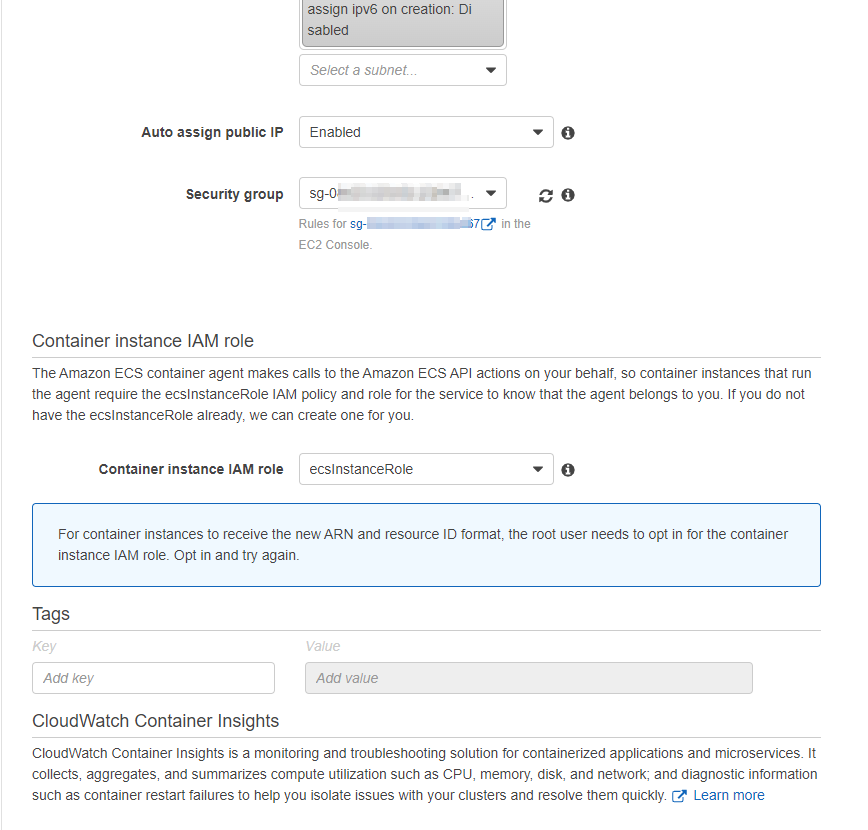
Enable the Public IP
Attach the security group that we created above. [Ex: demo-app-ecs-cluster]
Select default IAM ecsInstanceRole.
Click on create and go to the EC2 console after the cluster is created. We will find a new launched EC2 ,it is our cluster.

ECS Cluster
SSH into the cluster with the key we provided above while creating the cluster and run the command “docker ps”. We will see that ECS-Agent is running. So, ECS will accomplish all its tasks using the ecs-agent.

Process running on server (backend)
III. Creation of Service:
Step:1 Go to the cluster to create a service.
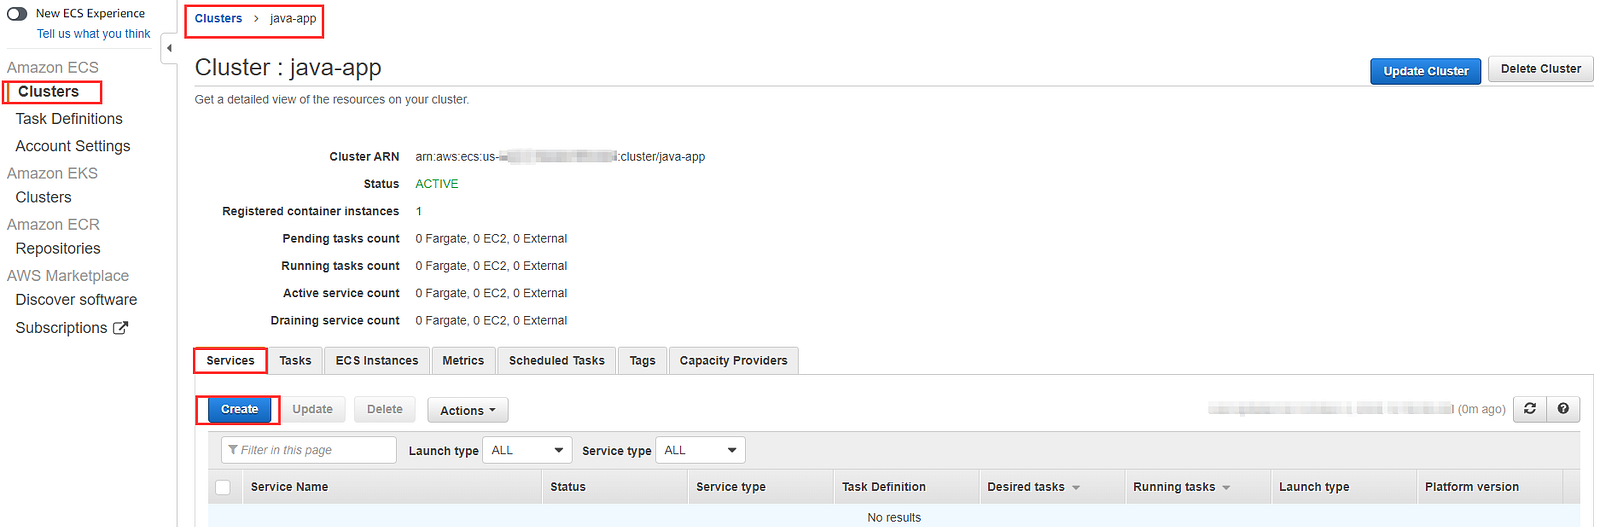
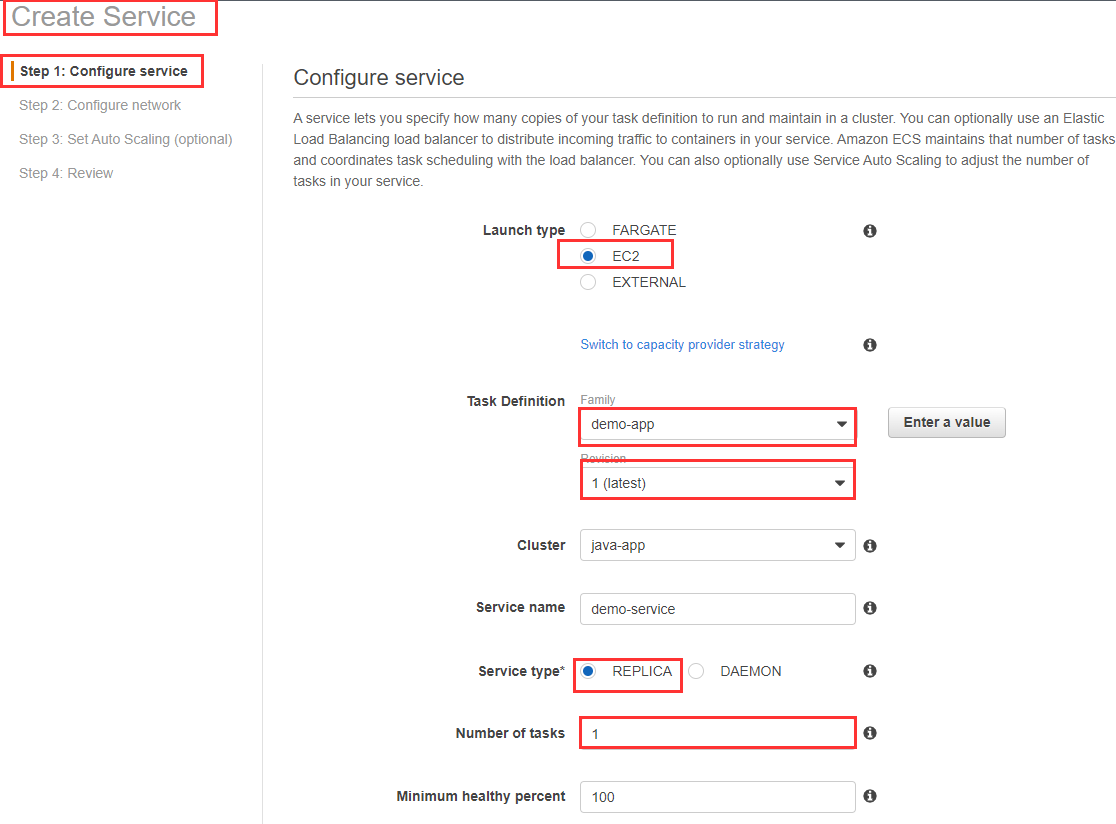
In Configure Service, select earlier created task definition, cluster and provide the service name. The number of tasks is the number of containers that will run on the cluster.
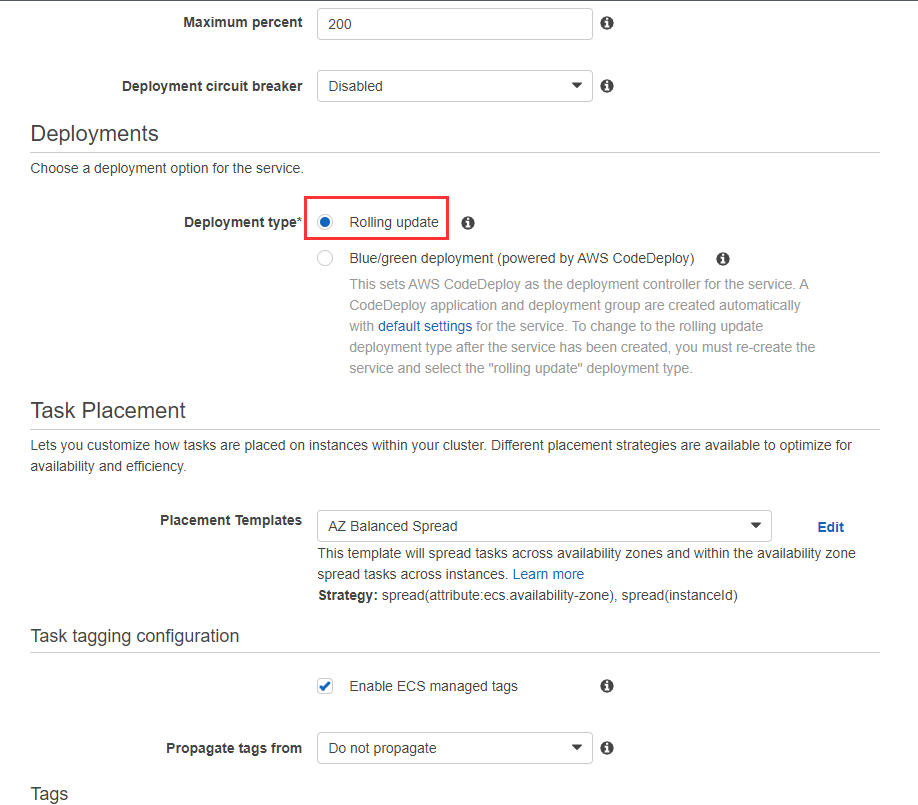
In deployments, select the rolling update. Blue/green will be discussed in upcoming blogs. Click on next step.
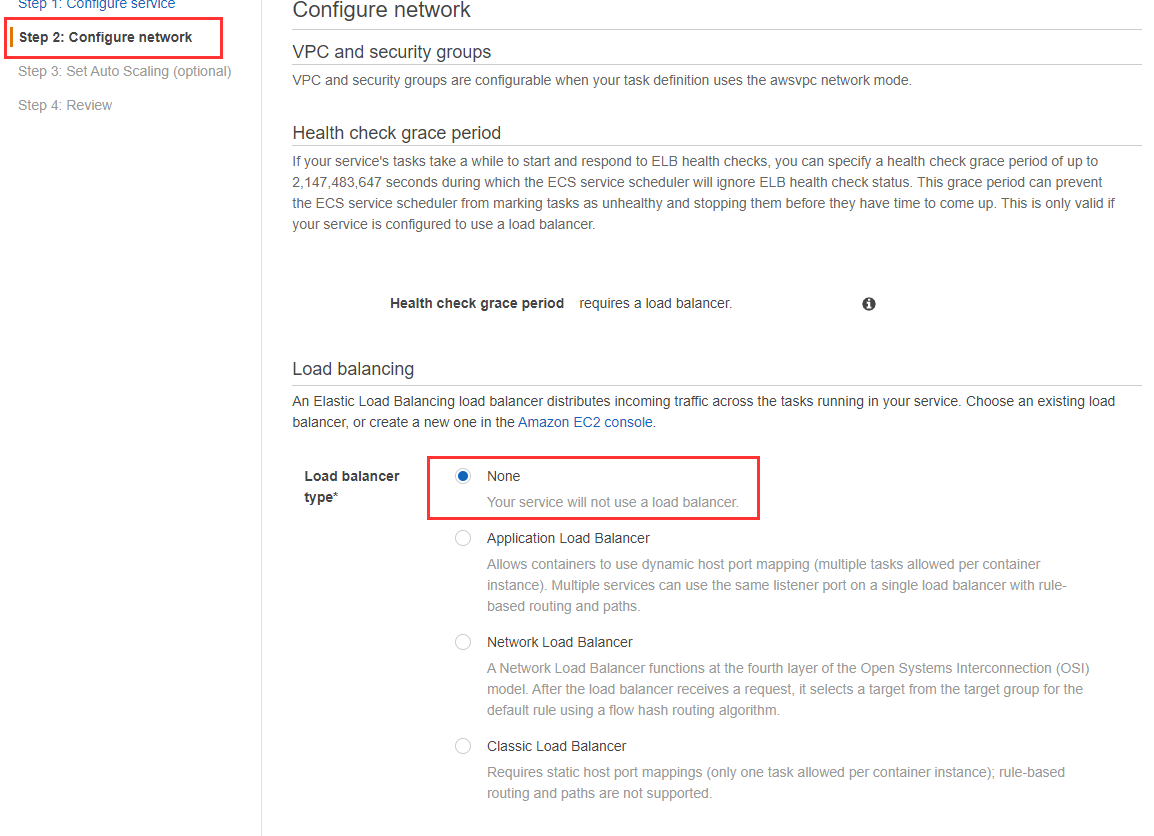
Step:2 In Configure network, select none in load balancer and click on Next
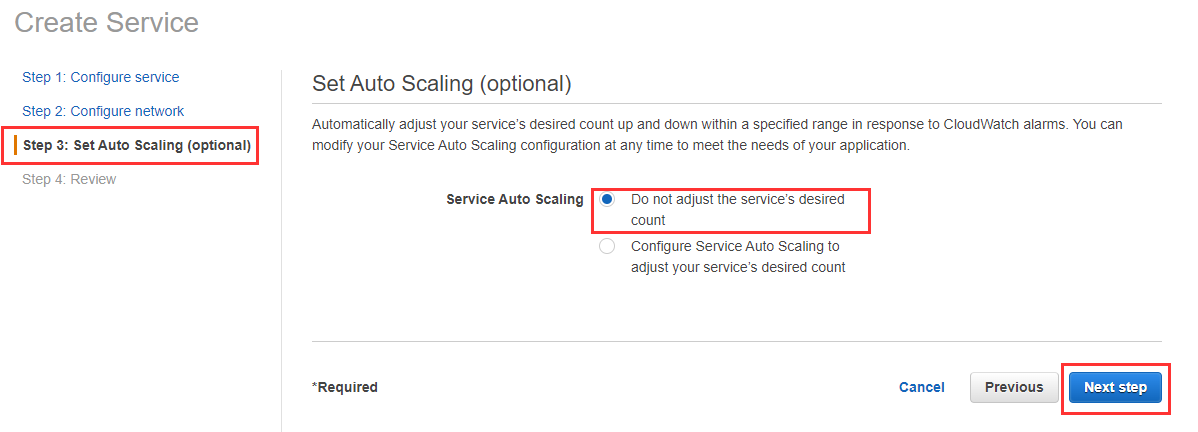
Step:3 In Auto Scaling, select the Do not adjust option and click on next step.
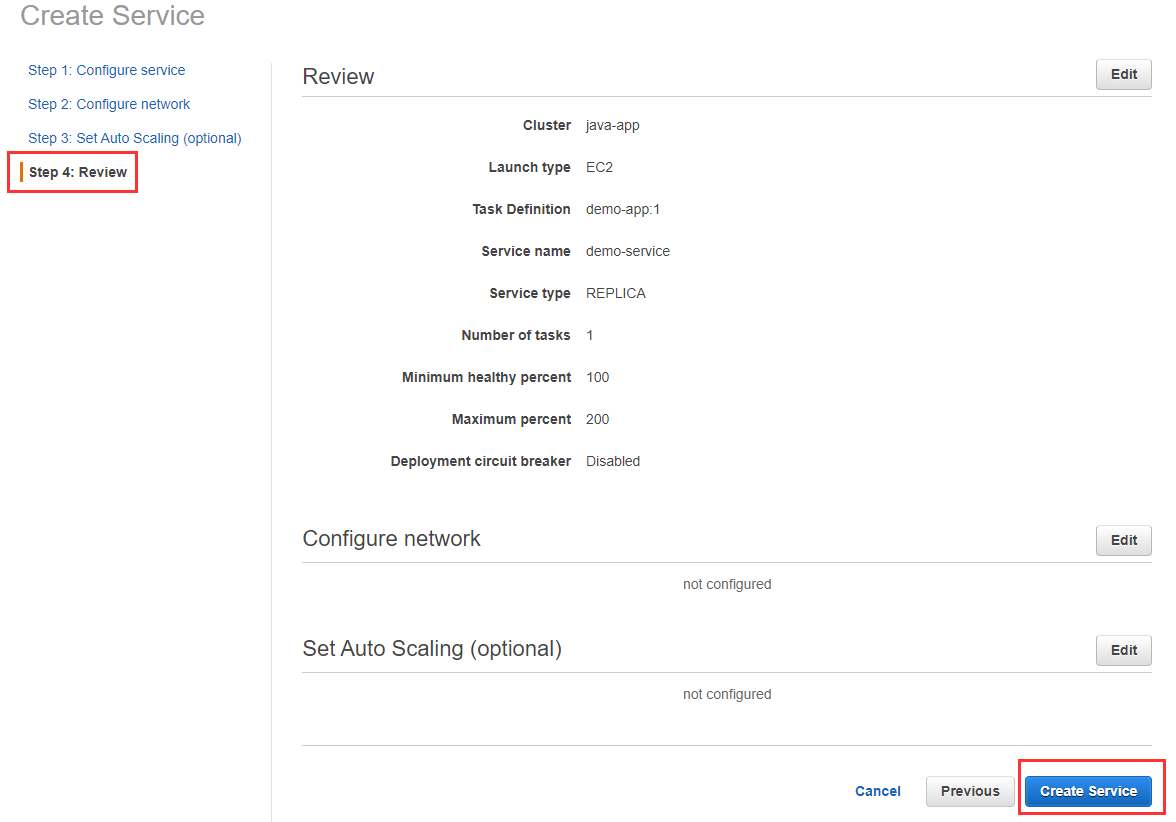
Step:4 Review it and click on create service.
Step:5 It will create in sometime. Now go to the service and click on Events. It will give us a detailed log about our deployment.
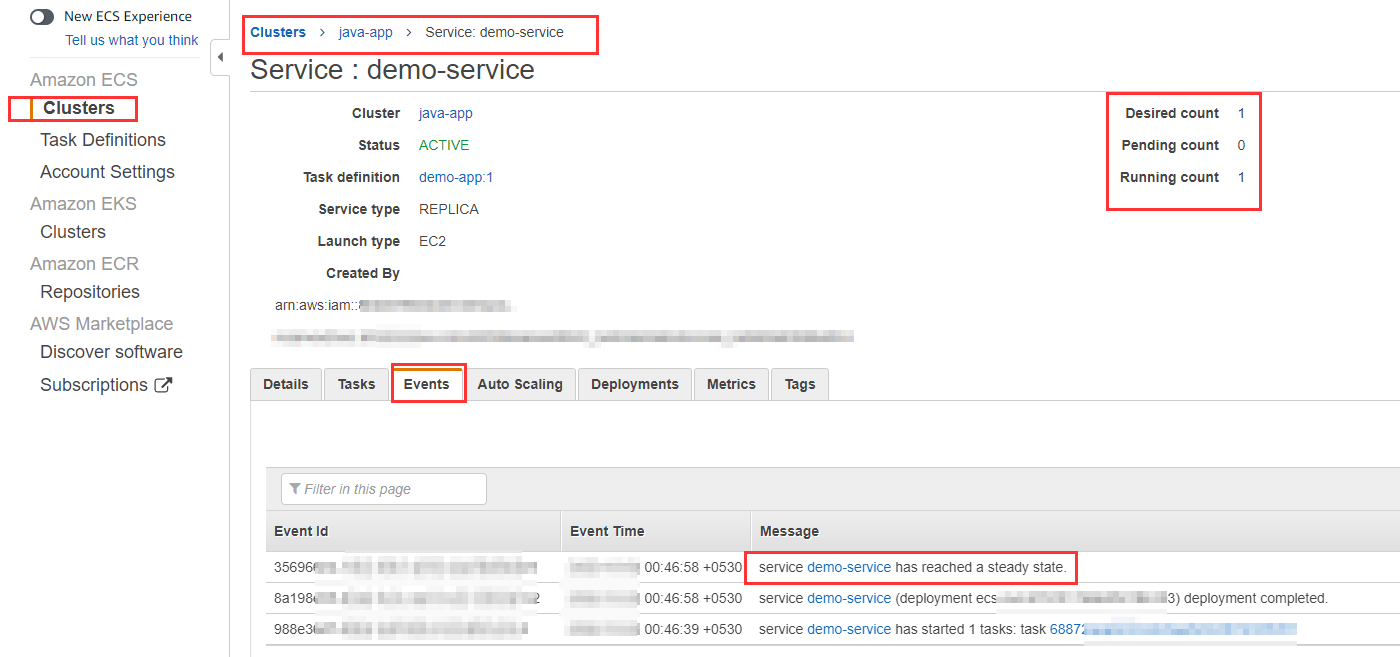
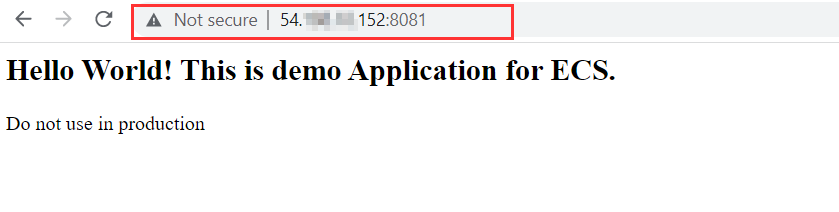
App running on ECS
Note: Tasks & Services
Task is a one-time event. If the container fails for any reason, our app will stop working because the cluster will not relaunch it.
Service is a permanent event. It will relaunch the container if the previous container is stopped due to failure.
In the below image, we can see that even after killing the container, it restarted due to service.

Extras:
We can increase or decrease the number of containers by modifying the Desired count in the Update service option.
We cannot update the task definition, we have to create a revision every time and make changes in service.
To delete it, delete the cluster and task definitions. It will delete all other resources.
References:
Creating a task definition using the classic console
Before running Docker containers on Amazon ECS, you must first create a task definition. When you create a task…docs.aws.amazon.com
GitHub - anshulc55/java-tomcat-sample-docker
Contribute to anshulc55/java-tomcat-sample-docker development by creating an account on GitHub.github.com