

AWS Amazon Inspector: Vulnerability Management


Amazon Inspector is a cloud native service for continuous scanning of Elastic Compute Cloud (EC2) and container workloads. It identifies software vulnerabilities and unintended network exposure which makes it a good vulnerability management service.
Now AWS Inspector scans ECR images and lambda functions.
Setting up Amazon Inspector
Navigate to AWS inspector, you will land on this page (first time users).
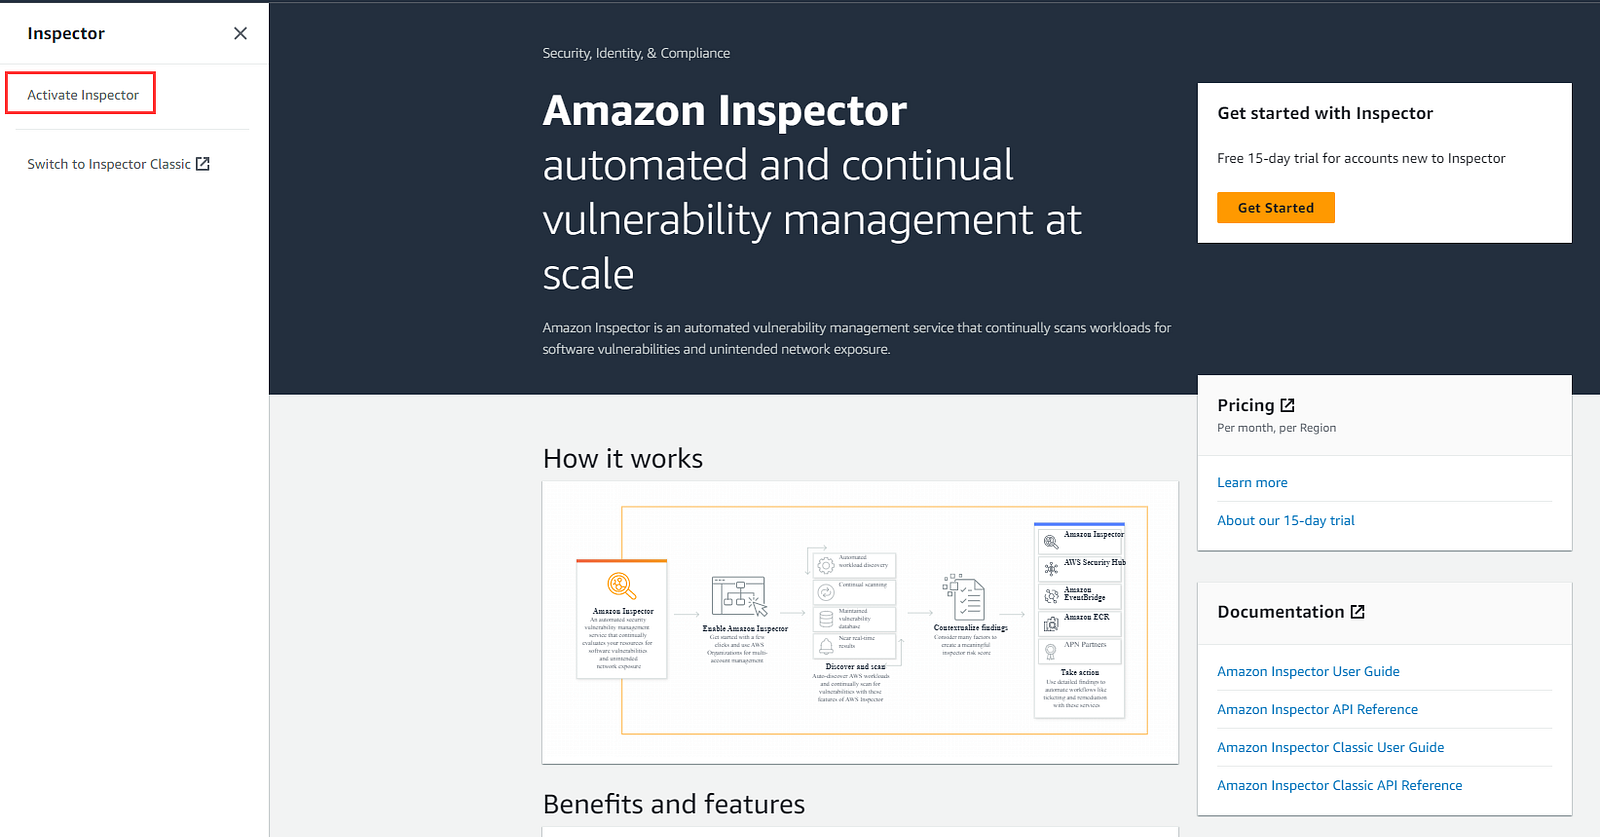
Click on Activate Inspector,

Before activating the inspector let’s review the permissions required by AWS Inspector. Click on View role permissions
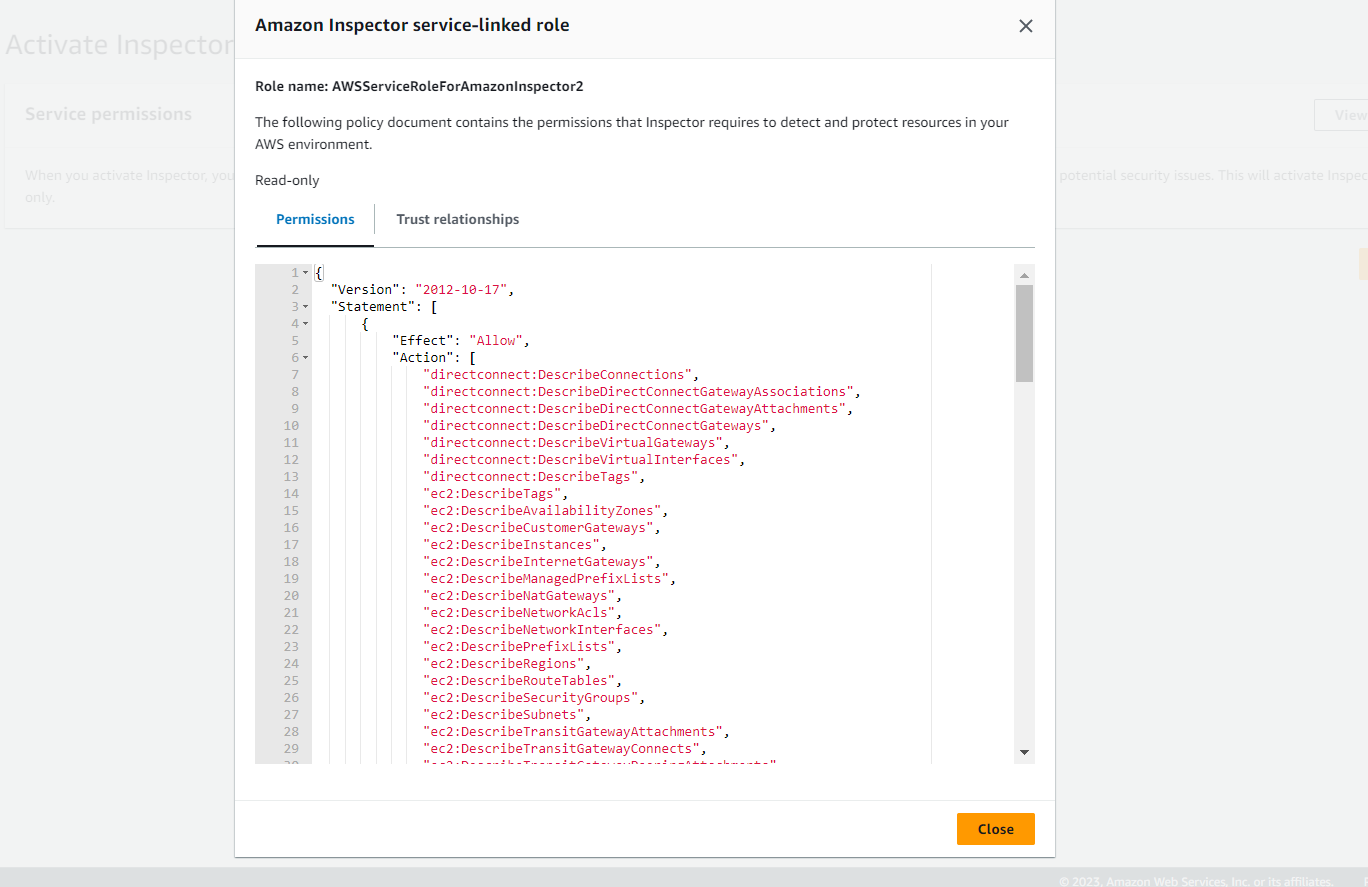
You can find the complete permission below,
{
  "Version": "2012-10-17",
  "Statement": [
      {
          "Effect": "Allow",
          "Action": [
              "directconnect:DescribeConnections",
              "directconnect:DescribeDirectConnectGatewayAssociations",
              "directconnect:DescribeDirectConnectGatewayAttachments",
              "directconnect:DescribeDirectConnectGateways",
              "directconnect:DescribeVirtualGateways",
              "directconnect:DescribeVirtualInterfaces",
              "directconnect:DescribeTags",
              "ec2:DescribeTags",
              "ec2:DescribeAvailabilityZones",
              "ec2:DescribeCustomerGateways",
              "ec2:DescribeInstances",
              "ec2:DescribeInternetGateways",
              "ec2:DescribeManagedPrefixLists",
              "ec2:DescribeNatGateways",
              "ec2:DescribeNetworkAcls",
              "ec2:DescribeNetworkInterfaces",
              "ec2:DescribePrefixLists",
              "ec2:DescribeRegions",
              "ec2:DescribeRouteTables",
              "ec2:DescribeSecurityGroups",
              "ec2:DescribeSubnets",
              "ec2:DescribeTransitGatewayAttachments",
              "ec2:DescribeTransitGatewayConnects",
              "ec2:DescribeTransitGatewayPeeringAttachments",
              "ec2:DescribeTransitGatewayRouteTables",
              "ec2:DescribeTransitGatewayVpcAttachments",
              "ec2:DescribeTransitGateways",
              "ec2:DescribeVpcEndpointServiceConfigurations",
              "ec2:DescribeVpcEndpoints",
              "ec2:DescribeVpcPeeringConnections",
              "ec2:DescribeVpcs",
              "ec2:DescribeVpnConnections",
              "ec2:DescribeVpnGateways",
              "ec2:GetManagedPrefixListEntries",
              "ec2:GetTransitGatewayRouteTablePropagations",
              "ec2:SearchTransitGatewayRoutes",
              "elasticloadbalancing:DescribeListeners",
              "elasticloadbalancing:DescribeLoadBalancerAttributes",
              "elasticloadbalancing:DescribeLoadBalancers",
              "elasticloadbalancing:DescribeRules",
              "elasticloadbalancing:DescribeTags",
              "elasticloadbalancing:DescribeTargetGroups",
              "elasticloadbalancing:DescribeTargetHealth",
              "network-firewall:DescribeFirewall",
              "network-firewall:DescribeFirewallPolicy",
              "network-firewall:DescribeResourcePolicy",
              "network-firewall:DescribeRuleGroup",
              "network-firewall:ListFirewallPolicies",
              "network-firewall:ListFirewalls",
              "network-firewall:ListRuleGroups",
              "tiros:CreateQuery",
              "tiros:GetQueryAnswer"
          ],
          "Resource": [
              "*"
          ]
      },
      {
          "Effect": "Allow",
          "Action": [
              "codeguru-security:CreateScan",
              "codeguru-security:GetScan",
              "codeguru-security:ListFindings",
              "codeguru-security:BatchGetFindings",
              "codeguru-security:DeleteScansByCategory",
              "iam:GetRole",
              "iam:GetRolePolicy",
              "iam:GetPolicy",
              "iam:GetPolicyVersion",
              "iam:ListAttachedRolePolicies",
              "iam:ListPolicies",
              "iam:ListPolicyVersions",
              "lambda:ListVersionsByFunction"
          ],
          "Resource": [
              "*"
          ]
      },
      {
          "Effect": "Allow",
          "Action": [
              "ecr:BatchGetImage",
              "ecr:BatchGetRepositoryScanningConfiguration",
              "ecr:DescribeImages",
              "ecr:DescribeRegistry",
              "ecr:DescribeRepositories",
              "ecr:GetAuthorizationToken",
              "ecr:GetDownloadUrlForLayer",
              "ecr:GetRegistryScanningConfiguration",
              "ecr:ListImages",
              "ecr:PutRegistryScanningConfiguration",
              "organizations:DescribeAccount",
              "organizations:DescribeOrganization",
              "organizations:ListAccounts",
              "ssm:DescribeAssociation",
              "ssm:DescribeAssociationExecutions",
              "ssm:DescribeInstanceInformation",
              "ssm:ListAssociations",
              "ssm:ListResourceDataSync"
          ],
          "Resource": "*"
      },
      {
          "Effect": "Allow",
          "Action": [
              "lambda:ListFunctions",
              "lambda:GetFunction",
              "lambda:GetLayerVersion",
              "cloudwatch:GetMetricData"
          ],
          "Resource": "*"
      },
      {
          "Effect": "Allow",
          "Action": [
              "ssm:CreateAssociation",
              "ssm:StartAssociationsOnce",
              "ssm:DeleteAssociation",
              "ssm:UpdateAssociation"
          ],
          "Resource": [
              "arn:*:ec2:*:*:instance/*",
              "arn:*:ssm:*:*:document/AmazonInspector2-*",
              "arn:*:ssm:*:*:document/AWS-GatherSoftwareInventory",
              "arn:*:ssm:*:*:managed-instance/*",
              "arn:*:ssm:*:*:association/*"
          ]
      },
      {
          "Effect": "Allow",
          "Action": [
              "ssm:CreateResourceDataSync",
              "ssm:DeleteResourceDataSync"
          ],
          "Resource": [
              "arn:*:ssm:*:*:resource-data-sync/InspectorResourceDataSync-do-not-delete"
          ]
      },
      {
          "Effect": "Allow",
          "Action": [
              "events:PutRule",
              "events:DeleteRule",
              "events:DescribeRule",
              "events:ListTargetsByRule",
              "events:PutTargets",
              "events:RemoveTargets"
          ],
          "Resource": [
              "arn:*:events:*:*:rule/DO-NOT-DELETE-AmazonInspector*ManagedRule"
          ]
      }
  ]
}
Amazon inspector scans the resources so it requires various permissions from AWS services and resources and it is predefined permissions.
Now enable the AWS inspector,
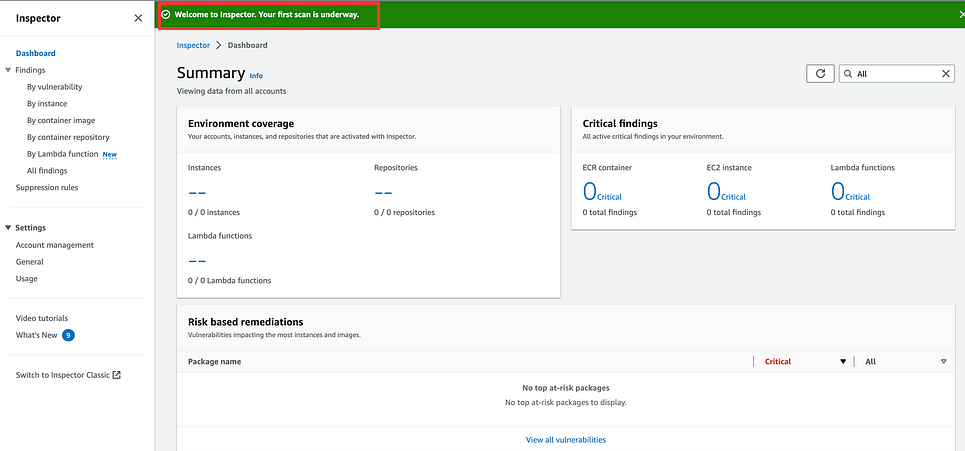
As soon as we click on Activate Inspector, it will start scanning the resources.
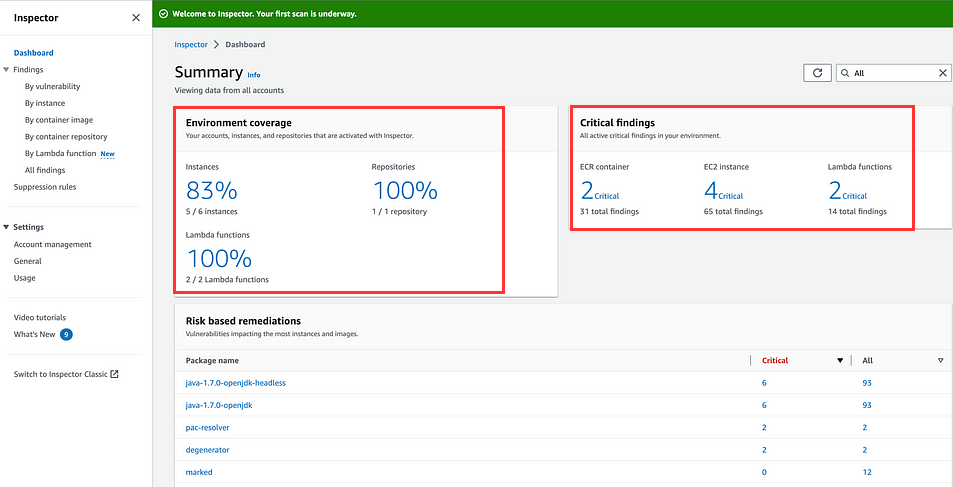
After some time we will see some values populating in Environment Coverage and Critical Findings Section. We can see findings about ECR, EC2 instance and Lambda functions.
To add EC2 instances in AWS inspector, inspector agent should be installed on all instances. It is preinstalled in Amazon Linux.
All the findings can be grouped by the following parameters:
All findings: Shows a complete list of findings for our environment. This is the default view when we navigate to the Findings page. In this view, we can filter by active, suppressed, and closed findings.
Vulnerability: Identifies the most critical vulnerabilities detected in our environment.
Account: It lists accounts and shows Amazon Inspector coverage and the total number of Critical and High severity findings for each account(in the case of AWS organization).
Instance: Identifies the most vulnerable Amazon EC2 instances in our environment.
Container image: Identifies the most vulnerable Amazon ECR container images in our environment.
Repository: This shows the repositories with the most vulnerabilities.
If you are using AWS organization then it is recommended to enable AWS inspector in admin account as you can control all the linked account on single dashboard. In account management, it will list all the linked accounts.
Filtering the Resources
Here, we will apply a filter on lambda functions, based on the name of the function. We can use filters based on tags also.
Navigate to Account management and click on the Lambda functions. Click the field, Add filter and select Resource type as “AWS Lambda Function”. Now, we will add one more filter “Function Name”. It will allow us to do more segregation within the Lambda service.

In account management we can see resource based grouping. However in Findings section, we can sort the findings based on severity of vulnerabilities.
Suppression Rule
We can create suppression rules aka filters in Amazon Inspector to exclude findings that are out of scope. It helps in focusing only on those findings that are the most critical to us. These rules neither impact any finding nor prevent Amazon Inspector from generating them.
If Amazon Inspector generates a new finding that matches a suppression rule, it automatically sets its status as Suppressed and that findings don’t appear by default. Though aws inspector stores these suppressed findings until they are remediated. Amazon Inspector detects remediated findings and closes them automatically.
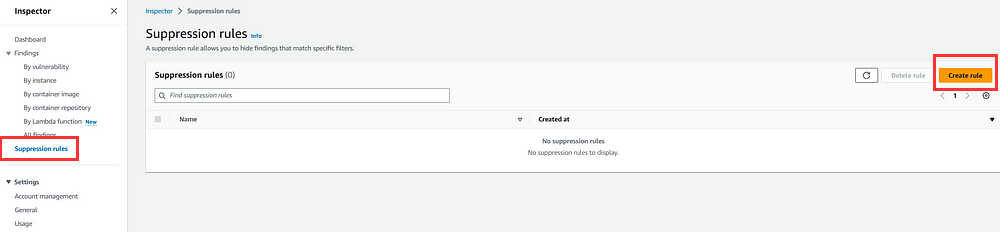
Let us create a suppression rule to suppress low severity findings,
- Click on Suppression rules in the left navigation, then click on Create Rule.
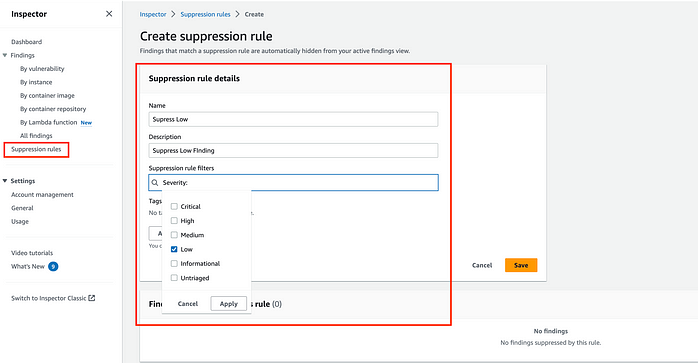
2. Fill in the Name and Description fields. Here, we are taking the name “Suppress Low” and description as “Suppress low Findings”
3. Under Suppression rule filters select Severity and check the box for Low.
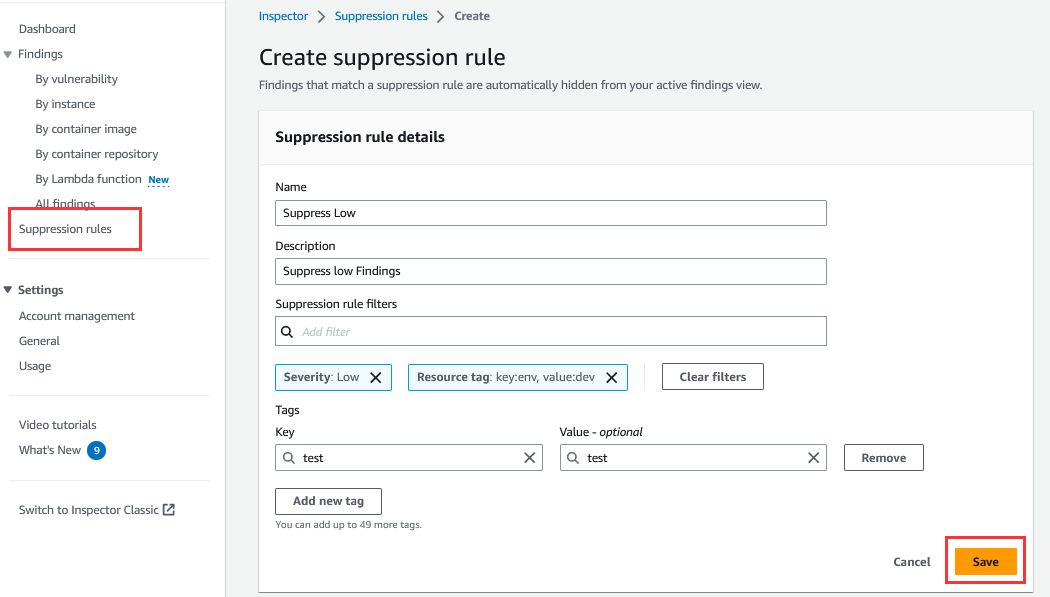
4. Then click to add another filter and select Resource tag. Input for the “env” for the key and “dev” for the value. We can preview the findings that will be suppressed at the bottom of the page. Now, click on save.
By default, Amazon Inspector does not display suppressed findings in the console. However, we can view the suppressed findings on the All Findings page by switching from Active to Suppressed in the drop-down.
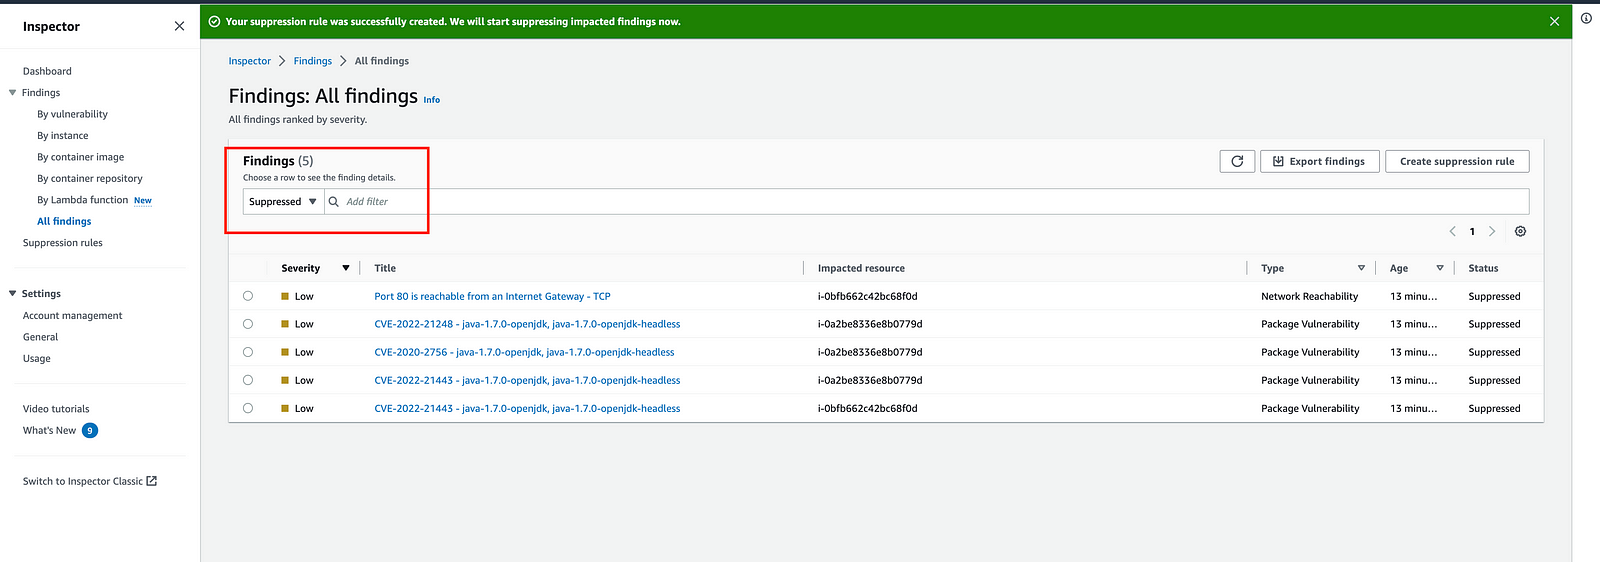
Suppressed findings
Scanning Container Images
Amazon Inspector scans container images present in Amazon ECR for software vulnerabilities to generate Package Vulnerability findings. So, we have two options for container image scanning,
a) Scanning by AWS Inspector
b) Scanning by ECR at the time of pushing the image only
I would recommend using AWS Inspector as it scans both operating system and programming language packages at the registry level and if a new CVE is added to its database, it scans all the eligible container images in ECR repositories( those are configured with automated scans.)
To view the vulnerability, navigate to the By Container Image section under Findings and select your image name to see the findings,
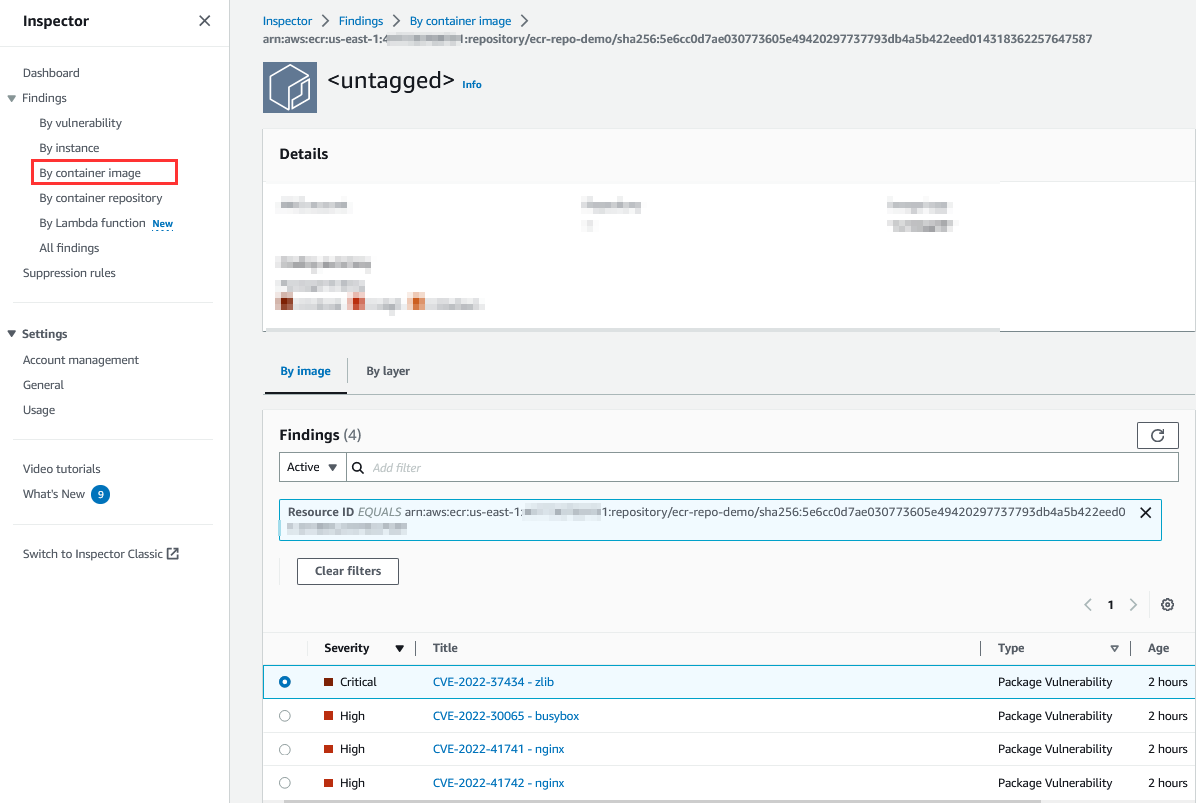
Reviewing Container Image Findings
In Amazon Inspector, a finding is a detailed report about a vulnerability that is present in one of our resources. Each finding is titled according to the detected vulnerability and consists of information like severity rating, affected resource name along with its remediation.
Amazon Inspector continually scans our environment and stores active findings until it detects that they are remediated and deletes the remediated findings after 30 days.
To see a finding report, click on the title of a finding i.e “CVE-2022-37434- zlib”. Notice this finding is for a software package zlib.
Click on the Inspector Score tab.
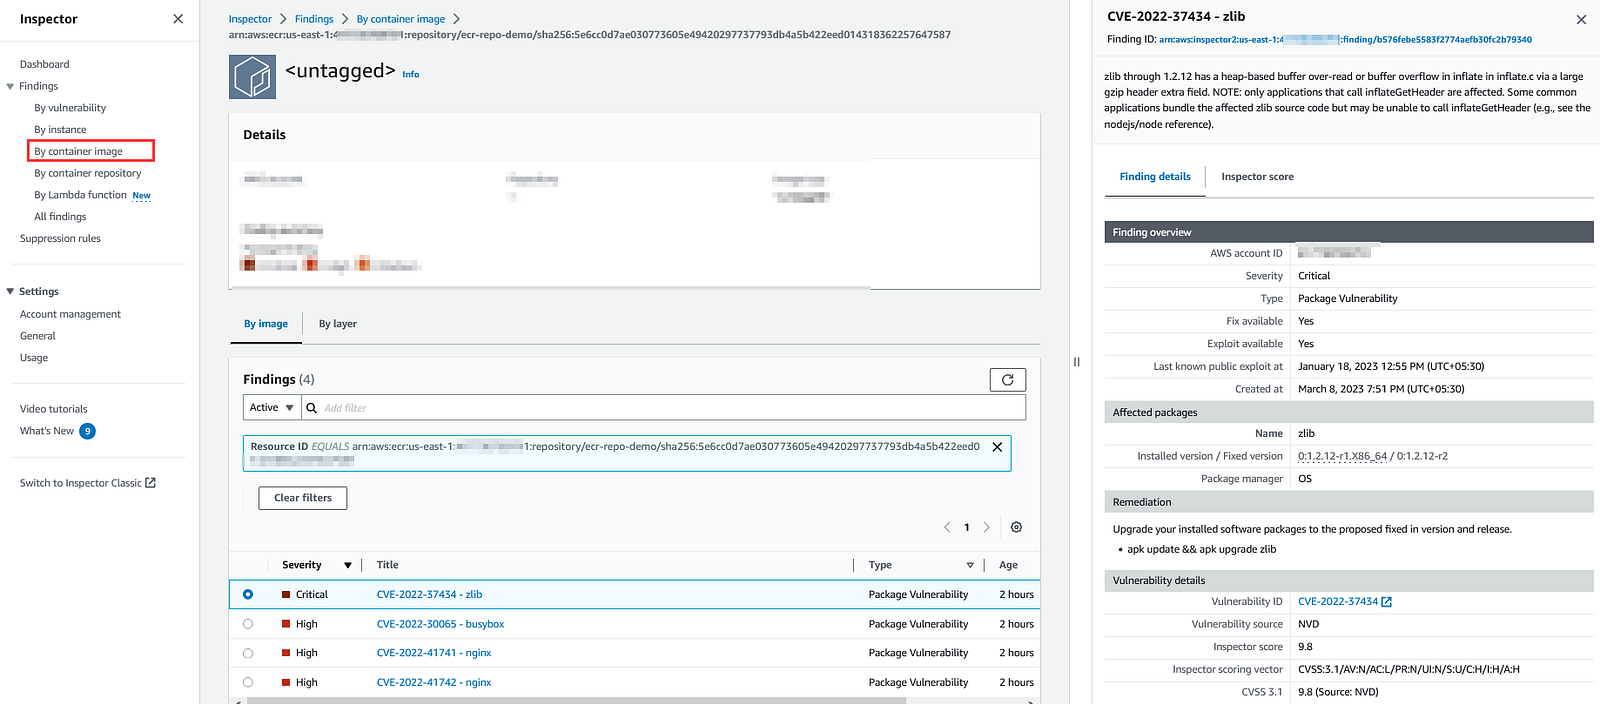
The Amazon Inspector risk score is generated for each finding in correlation with CVE information. This score allows us to prioritize findings and focus on the most critical findings and vulnerable resources.
We can also check the remediation and update our package to fix the vulnerability.
I found AWS Inspector great service provided by AWS for vulnerability management. You should also try implementing it in your environment and let me know your views.
Till the next time, we say goodbye !!
References:
Getting started with Amazon Inspector Classic
This is the user guide for Amazon Inspector Classic. For information about the new Amazon Inspector, see the Amazon…docs.aws.amazon.com